
Hello and welcome back to my blog! Today’s blog is going to be a tutorial on how to glam up an old pair of jean in TWO different ways. I though about two ideas since you may have more than one jean in your closet that you want to glam up, or just for some future reference.

The first tutorial is: PEARL JEANS.
I have had an obsession with pearl jeans for the last 3 years and I have never owned a pair and thought that it would be super fun to DIY it. My sister owns two pairs of pants with pearl embellishments and I used it as my inspiration.
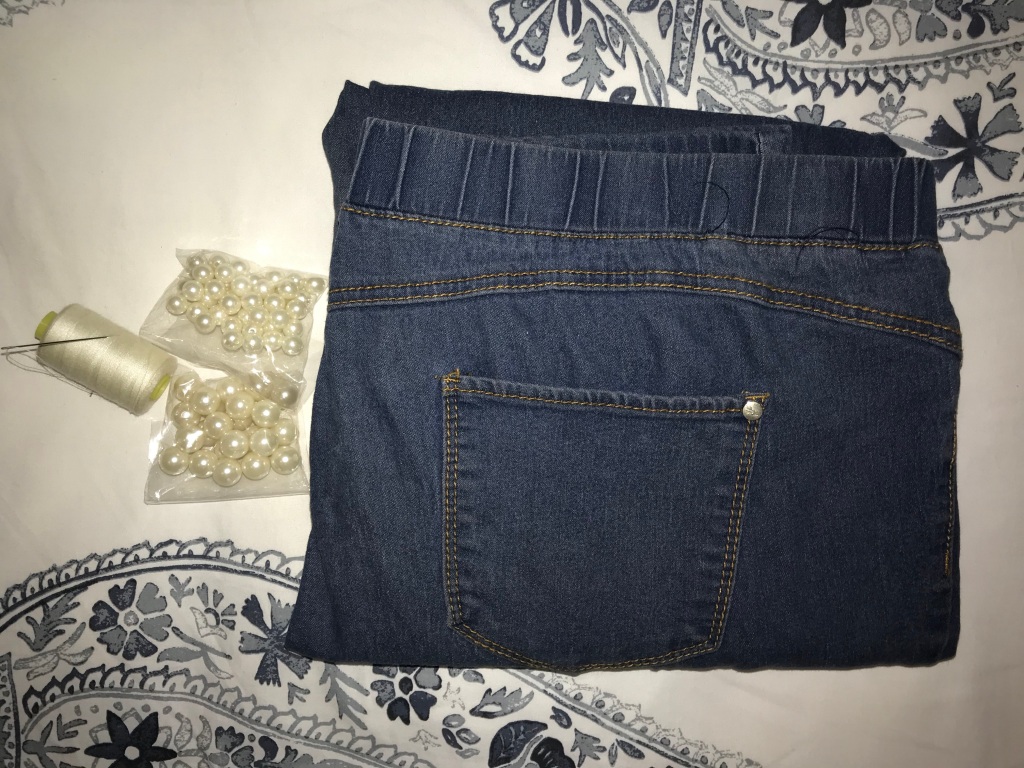
WHAT YOU NEED:
- Pearls (any size you want, I have small and big pearls).
- A needle and white/cream thread
- A pair of scissors
- Jeans
- A marker
- Pin needles.
Here are the steps to follow:
The first thing I did was laying out the pearls on the jean to see where I want them and how I want to place them. For my jean I decided to do the right top of the leg, but you can do it any way you want. I used the pin needles to keep my pearls stable and this will also help you in the next step. Another tip is to take a photo of the jean to remember where you placed the pearls if you are going to use different sized pearls.

After that I took off the pearls, but left the pin needles. As I took out the needles I made a small dot with my marker. Because I am using smaller and bigger pearls I just checked the photo I took earlier of the pearl placement to help me remember the placement of the different size pearls. I would recommend that someone help you with this, as it can get tricky.


After making the dots I can now clearly see where the pearls have to go.
Then you can start to hand sew the pearls on. Sew the pearl four times through the holes of the pearl and after the fourth time, wrap the thread around the pearl about two-three times to make sure it is fully secured. Do this with all the pearls. End off with a double stitch underneath the denim to make sure the pearl is not going anywhere.
When you are done make sure that all the pearls are stable enough to survive. And then there you have your own DIY Pearl Jeans.I love this tutorial and think that the jeans looks much more beautiful than before. Now I finally have my own pair of pearl jeans.

THE SECOND TUTORIAL IS: DIAMOND EMBELLISHED JEANS
This is another DIY jean tutorial. This tutorial is more for the diamond/sparkling lovers out there. I recently bough a pair of jeans from Ackermans with diamond embellishments and thought that this could also be a very quick, easy and affordable DIY.

WHAT YOU NEED:
• A pack of diamond stickers
• Jeans

Here are the steps to follow:
All you need to do is get a jean that you like and want to glam up with some diamonds and stick the diamond stickers where you like. For mine I am going to roll-up about 5cm of the bottom of the jean and then stick the stickers right above the fold in random order, and the abra-kadabra there you have some sparkling jeans.
I would recommend that you to use some form of glue with the stickers if you want the diamond stickers to last a bit longer, or if you got a big pack of the stickers you can always just stick new stickers on if the others fall off.
I hope you find these tutorials interesting and please share the photo’s of your glam jeans on Instagram and tag me!
All my love
KM.
